Exporting data

This chapter explains how to export various kind of data out of Squey.

Exporting selection

../../_images/export_selection.png

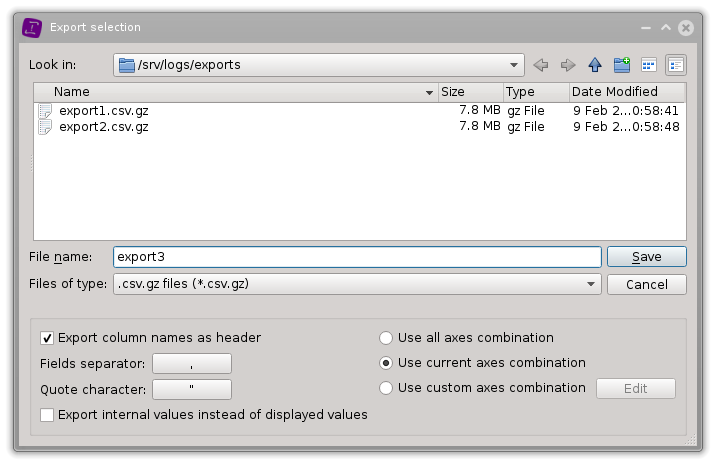
The following options can be specified:

  1. export column names as header: Specify whenever the exported CSV data contains the names of the axes as first line, starting with a # (hash) character. You can then choose to ignore this header if the CSV needs to be imported back into Squey.

  2. Separator/quote characters

  3. custom axes combination: You can choose an alternate axes combination to remove or reorder the exported columns.

  4. chose compression type (gz, bz2, zip or none)

Exporting the selection can be done by the global menu on the current selection:

../../_images/export_selection_menu.png

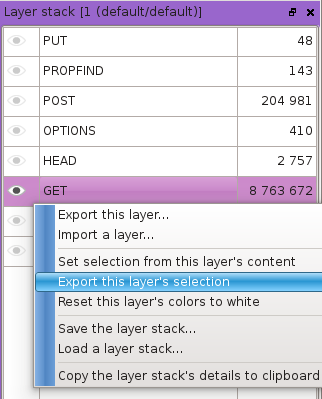
or by using the context menu on a specific layer:

../../_images/export_selection_context_menu.png

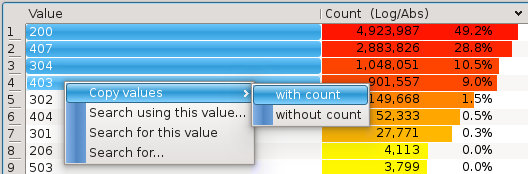
Exporting statistics

Selected values can be exported as CSV using the contextual menu “Copy values”. Chosing to export the count values currently shown (occurence count, scientific notation, percentage) as well is up to the user.

../../_images/statistical_views_export_values_with_count.png

A line separator can as well be specified in order to export as a plain list or as a CSV file for example (default is carriage return).

Alternatively, the whole list of values can be copied to the clipboard or to a file using one of the three buttons located on the bottom of the dialog.

../../_images/statistical_views_export_values.png

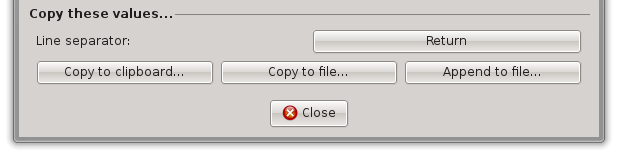
When doing so, a message box will ask the user if they want to export the count informations as well.

../../_images/statistical_views_export_values_msgbox.png

CSV output is as follow when count informations are wanted:

"200","4,923,987","49.2%"
"407","2,883,826","28.8%"
"304","1,048,051","10.5%"
"403","901,557","9.0%"

Exporting images

Even though the desktop environment permits to do screenshots, Squey provides its own way to do capture of its interface. There are three available capture mode:

  • whole desktop

  • Squey main window

  • Squey sub-window (dialog, views, etc.)

To do a desktop capture, press ‘control’ + ‘p’.

To do a capture of the main window, press ‘shift’ + ‘p’.

To do a capture of a sub-window, move the mouse cursor at a given location (described below) and press the ‘p’ key. The differents sub-windows are:

  • any dialogs (filter editor, etc.): the mouse cursor can be at any position in the dialog;

  • any views (graphical, non-graphical, or statistics): the mouse cursor can be at any position in the view;

  • any source tabs: the mouse cursor can be at any position in the source’s toolbar of over the source’s tab;

  • any worspaces from the “Workspaces” tab: the mouse cursor can be at any position in the workspace or over the workspace’s tab;

  • the start screen: the mouse cursor can be at any position over the start screen;

  • the Squey main window (as with ‘shift’ + ‘p’): the mouse cursor must be over the global menu.

After the capture, a dialog asks you where to save the image; only PNG format file is supported.