Layer Stack View
The Layer Stack View is the widget that manages all existing Layers of a View. By default, it is located at the bottom-right corner of the application’s window.
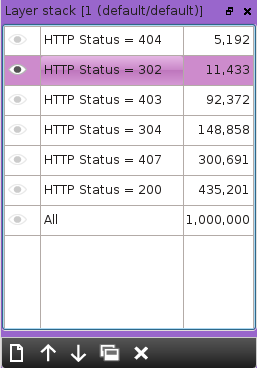
Layers priority is increasing from bottom to top. It means that the first visible Layer is the one on top of the Layer Stack View and that the less visible Layer is the one at the bottom of the Layer Stack View.
This hierarchy of Layers has a direct impact on some graphical representations. For example, on the Global Parallel Coordinates View, the color of a visible line is strongly dependent of the Layers’ order in the Layer Stack View. In particular, this means that if a line exists in the top-most Layer and has color red in that Layer, and if the same line exists in another Layer (necessarily below the top-most), with any given color, the same line will be visible in the Global Parallel Coordinates View in red.
This means that there is no color blending of lines between Layers: the top-most color overwrites all lower colors!
For each Layer in the Layer Stack View, three piece of information are displayed:
The ‘visibility status’ of the Layer. When a layer is not visible, lines that it contains are rendered as ‘Zombie Lines’ and cannot be selected.
The name of the layer
The number of events in the layer
We will now detail all the functionalities of the Layer Stack widget.
Contextual menu
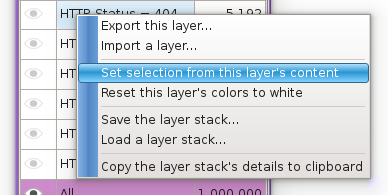
A right-click on a layer gives access to it’s Contextual Menu.

From there, the following actions can be taken:
‘Set selection from this layer content…’ Set the current selection to the content of a layer.
‘Export this layer selection’ Export the current layer selection in a file.
‘Reset this layer’s colors to white’ Reset to white the lines colors of the current layer.
‘Show this layer only’ Hide all the other layers.
‘(Boolean operations)’ Perform the selected boolean operation between the current selection and the selected layer
‘Copy the layer stack’s details to clipboard’ Copy to the clipboard the list of layers and their event counts as a tab separated values text.
Creating a new layer
There are three ways to create a new layer.
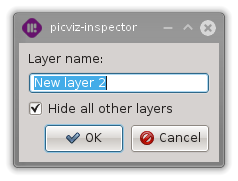
You can either:
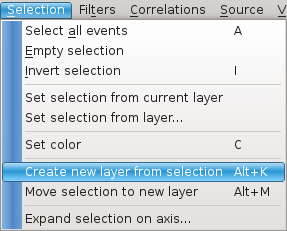
Use the Application Menu Go to the Selection menu, then to the Create new layer from selection entry.
Use a shortcut You can type +Alt+k+ to create a next layer from the current selection
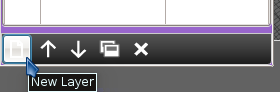
Click on the ‘New layer’ Icon of the Layer Stack.
Copying the current selection
By clicking ‘Create new layer from selection’ on the ‘Selection’ menu (or using its associated ‘Alt+K’ global shortcut).
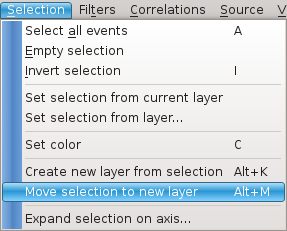
Moving the current selection
By clicking ‘Move selection to new layer’ on the ‘Selection’ menu (or using its associated ‘Alt+M’ global shortcut).
From the complete selection
By clicking on the ‘New layer’ button located at the bottom of the layer stack widget.
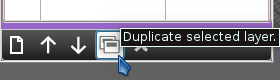
From an existing layer
By selecting the wanted layer and by clicking on the ‘Duplicate selected layer’ button located at the bottom of the layer stack widget.
Inverting the selection after a layer creation
By clicking ‘Set selection from this layer’s content’ on the wanted layer in the layer stack widget.
Accessing the view
