Start screen
When starting Squey, it usually looks like this:
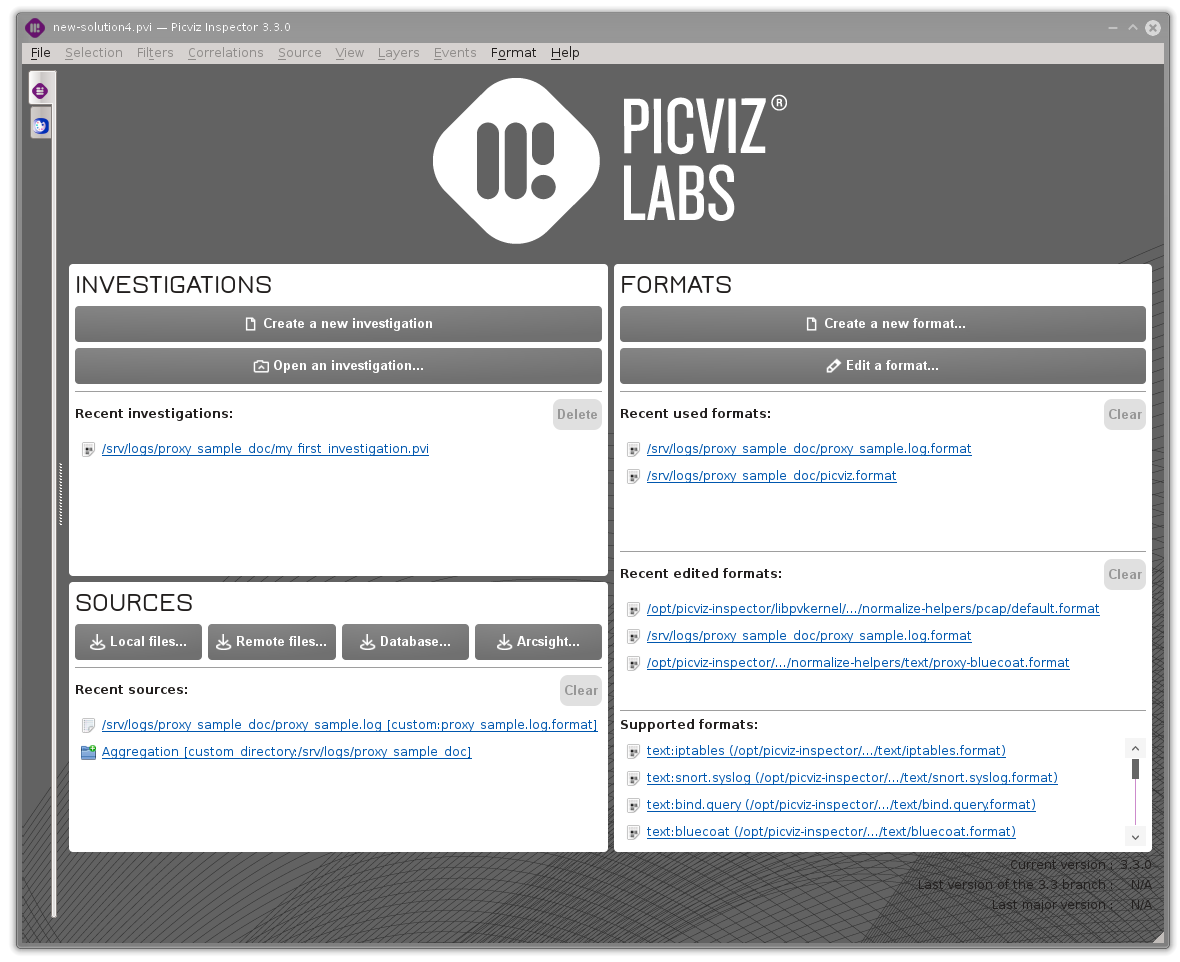
Start Screen organization
We observe that the Start screen is divided into three areas:
the Sources area
the Formats area
In the next subsections, we give a rapid presentation of these three areas. The next sections present each of these areas in detail.
The Sources area in brief
This area gives a short historical list of the most recent Source of data that have been imported in the software lately. Use this area and the entries it has, if you want to start a new Investigation on the designated Source of data. This is the best way to go when one wants to reanalyse a dataset but not reuse an existing Investigation based on that dataset.
Note
to be precise, a Source is a dataset associated with a Format that gives Squey all the elements it needs to handle and split the Events of the given dataset. It means that if a user clicks on one of the entries of the Sources area, it will also ask Squey to reuse the same Format that is associated with this Source in the historical list.
Needless to say that, when clicking on an entry of the list, the associated dataset will be imported again (the user will have to take into account the duration of the Import Process).
The Formats area in brief
The Formats area is the best place to manage Formats.
From this area, it is very easy to start creating a new Format or to edit an existing Format. In the latter case, when one needs to access an already existing Format, the Formats area offers three different short lists of Format:
The Investigations area in brief
“Investigations” are Squey native container file format. It is named after the fact that the most common usage of Squey is to conduct an investigation and, therefore, when interrupting such a demanding activity, the user usually wants to save as much as it can from the state of the application and the ongoing investigation.
The ‘Investigation area’ is the place from where the user will reload a previously saved investigation to continue it.
A simple click on one of the Investigation of the dedicated historical list will simply reload the targeted Investigation, making it ready to be pursued. (See the Investigations area section for more details about this topic.)
Warning
Beware that the loading time of an Investigation can be of a few minutes, according to the size of the original imported data and the complexity of the Layers
Managing the history of each area
As you have probably already noticed, Recent items are displayed everytime they are relevant in the area. The entries of these historical lists are ordered according to the natural rule: most recent items are located at the top of the list.
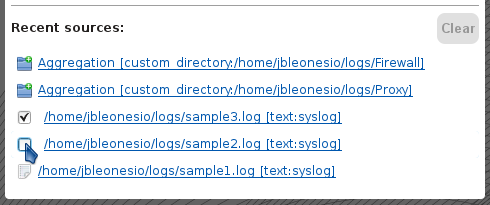
It is possible to remove some items from the history by checking some of them and then clicking on the ‘Clear’/’Delete’ button.
If you want to remove all the items, just click on the ‘Clear’/’Delete’ button and confirm that you really want to fully empty the history!
Logs formats
Most logs that will be investigated through the usage of Squey software and Analysis Stations are usually in plain text format. + In this category, one finds logs files that:
hold one Event per line of the file
are multiline file format: in this case, an Event has a content that is spread through multiple lines.
On the other side, some logs or datasets are provided in binary formats. Except for a few exceptions, it is most probable that Squey won’t be able to directly access and process such file formats. + The binary formats that can be directly opened by Squey are:
compressed files: .zip, .gz, .tgz, etc.
pcap files.
Sources area
For Text files, Squey processes a set of Inputs through a chosen Format, to generate Events split in different Fields. The types of Inputs Squey can manage is not restricted to plain text files.
Indeed, Squey has a modular plugin-based architecture that allows it to manage different types of Inputs. The rest of this section will present in detail the Input Plugins that are available in the latest version of Squey:
Text files
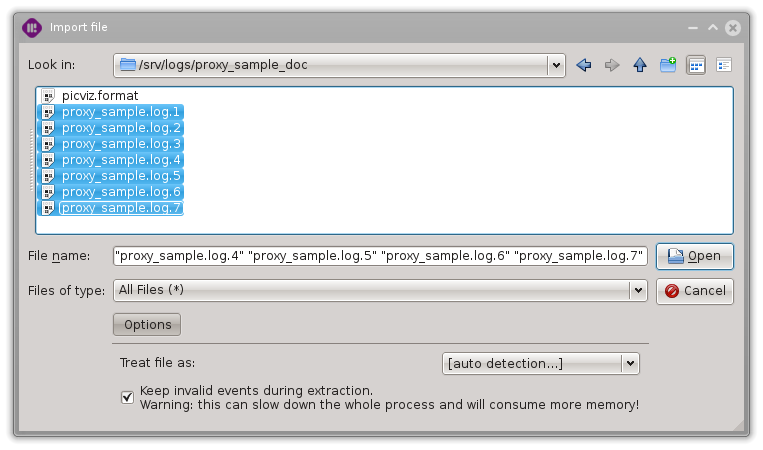
There are several ways to specify a Format to parse input files.
If the Source is made of only one input file named ‘example.log’, ‘example.log.format’ located in the same folder is used if existing.
If such a Format does not exist or if the Source is an aggregation of several input files, Format file ‘squey.format’ located in the same folder is used if existing.
If neither of the two previous Formats are found, Formats located in the folder ‘/opt/squey/normalize-helpers/text’ are used. They can be resolved automatically or be selected explicitely in the ‘Treat file as’ combo menu located on the options of the file chooser dialog.
Note
You can make it easier to change the Format to use by making a ‘squey.format’ symbolic link pointing towards the format of your choice located in any particular folder.
Database queries
This plugin allows to load result from queries on local/remote databases. Supported databases are: QIBASE, SQLite, QSQLITE2, QSQLITE3, MySQL, ODBC, QPSQL7, QPSQL, QTDS7, and QTDS.
To set up a database query, select the type of the database, the hostname/IP of the remote machine and the username/password authorized to connect to the named database.
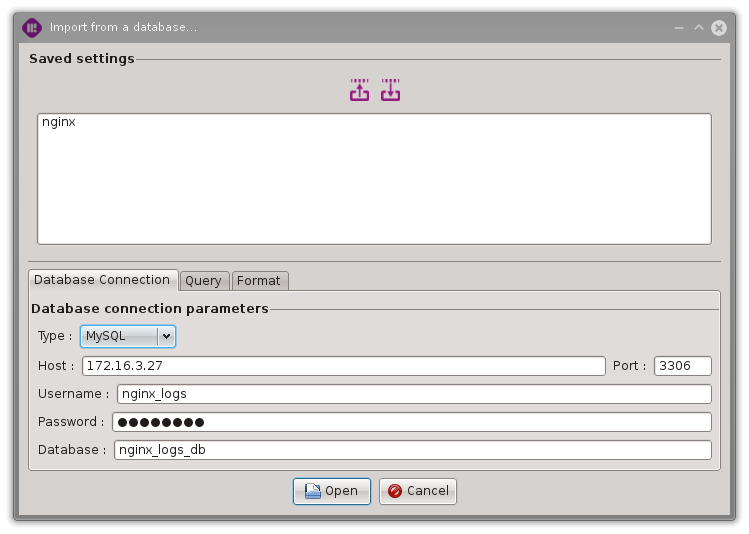
Then type the query that will be executed on the specified database.
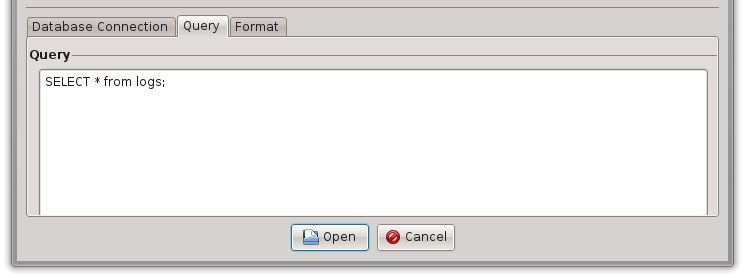
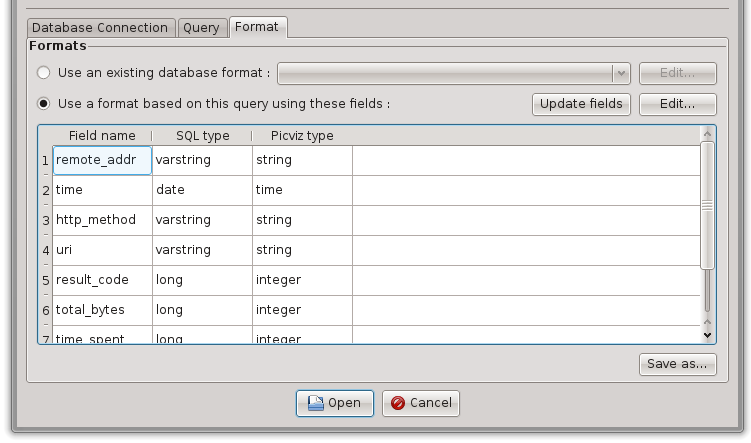
You can check the result of the query on the ‘Format’ tab by selecting ‘Use a format based on this query using these fields’ and clicking ‘Update fields’.
Warning
Beware that passwords are stored in plain text in ‘~/.config/squey*’ directories so be sure to set up the appropriate filesystem permissions.
Elasticsearch queries
This plugin allows to load results from queries on local/remote Elasticsearch server.
To set up a Elasticsearch query, enter the hostname/IP and the port of the remote machine and the login/password authorized to connect to Elasticsearch.
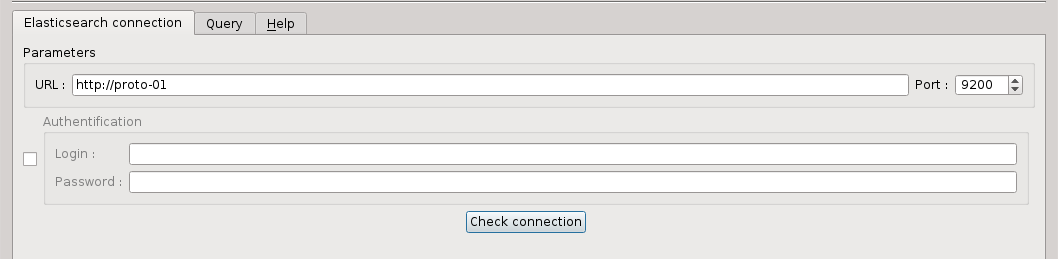
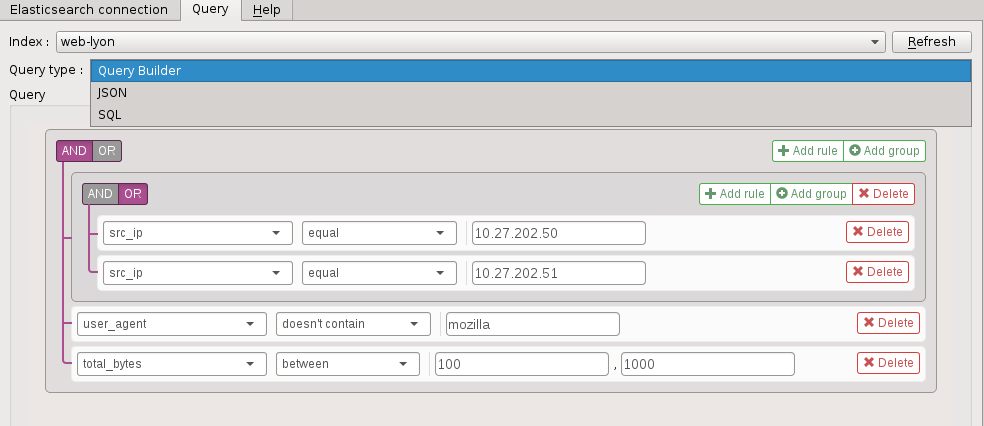
Then select the ‘index’ and type the query that will be executed on the server. You have three ways to enter the query:
the graphical Query Builder plugin
the Elasticsearch json query language
the SQL language (You have to install Elasticsearch SQL plugin on the server before - https://github.com/NLPchina/elasticsearch-sql/)
You can check the result of the query with the ‘Get result count’ button, export it to CSV file with the ‘Export’ button, or ‘Open’ button to investigate it with Squey.

Note
Before investigating the query result with Squey by clicking on the ‘Open’ button, you have to make the suitable Squey format for this query.
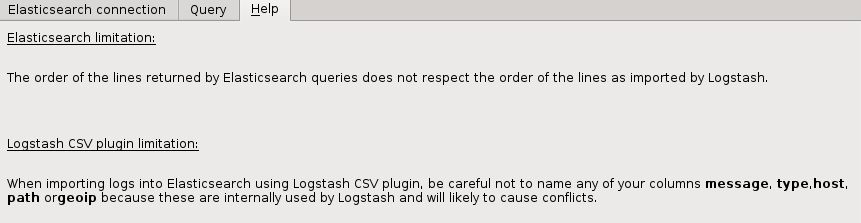
The ‘help’ tab liste the known limitations of the plugin.
Warning
Beware that passwords are stored in plain text in ‘~/.config/squey*’ directories so be sure to set up the appropriate filesystem permissions.
Apache Parquet files
This plugin allows to seamlessly load Apache Parquet files.
PCAP Files
This plugin allows to load PCAP files.
Import process
The import is the operation of parsing Inputs using a given Format in order to produce an internal representation that drastically speeds up investigations’ interactions.
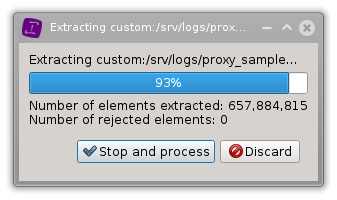
You can interrupt the operation anytime and chose, either to continue using the data processed so far, or to discard the processed data completely.
A dialog displaying all the invalid Events (if any) is shown at the end of the import stage:
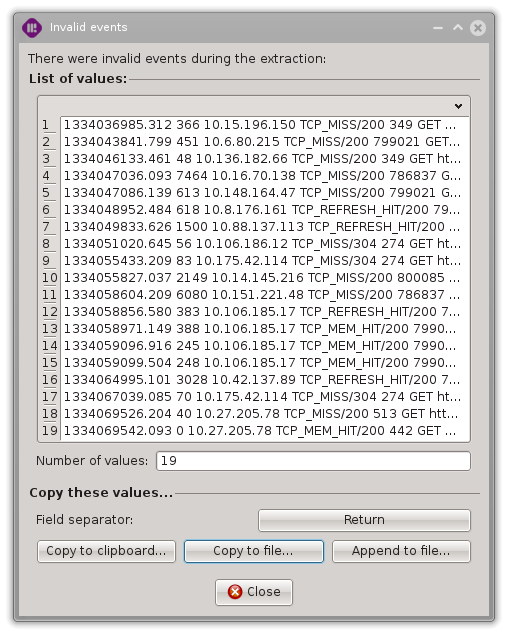
Copying these values to a file can then be useful to refine the format or to create another one.
Formats area
Three categories of Formats are displayed on the Start screen:
Recent used Formats : list all the Formats being recently used by the application.
Recent edited Formats : list all the Formats being recently modified.
Supported Formats : list all the Formats located in ‘/opt/squey/normalize-helpers/text’
To learn more about Formats and how you can write your own Formats for your logs, go to the Format builder chapter.
Investigations area
When saving an investigation, all its underlying structure (data tree) is saved including data collections with their sources as well as layers defined in these sources.
The import cache is also kept in order to reduce next loading time. Import cache can then be managed by clicking on the “Delete” button of the “Investigation” section. Note that if an investigation is deleted using this dialog or directly by removing the investigation file (.pvi) on disk, the import cache is automatially removed.
To manage investigations, click on the ‘Delete’ button :
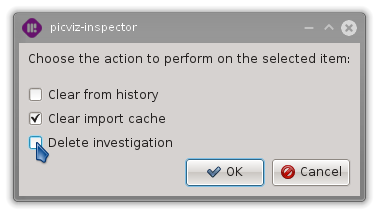
Clear from history: remove the investigation entry from the history.
Clear import cache: remove import cache stored on disk (will be recreated on next loading).
Delete investigation: clear the history, remove the import cache and delete the investigation file (.pvi) on disk.